ArtGuru Face Swap Tool may take a few seconds, please be patient.
ArtGuru Face Swapper AI Tool
How to use ArtGuru Face Swap?
Step 1. Upload Source Image
The source image is the one whose face you want to use in another photo.
On the face swap tool page, you’ll find an option to upload or drag your source image.
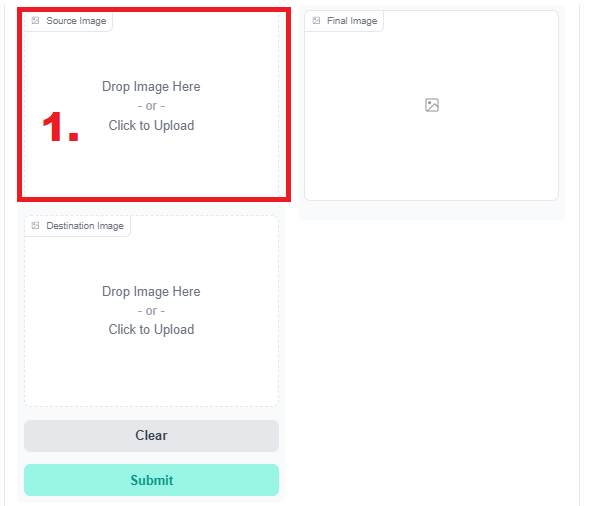
You can either click on the upload area to select a file from your computer or drag a photo directly into the designated area.
Once you select or drag your photo, it will appear on the screen, indicating it’s ready for swapping.
Step 2. Upload Destination Image
The destination image is where you want the face from the source image to be placed.
Similar to the source image, you can either click to upload or drag the destination image into the designated area on the tool page.
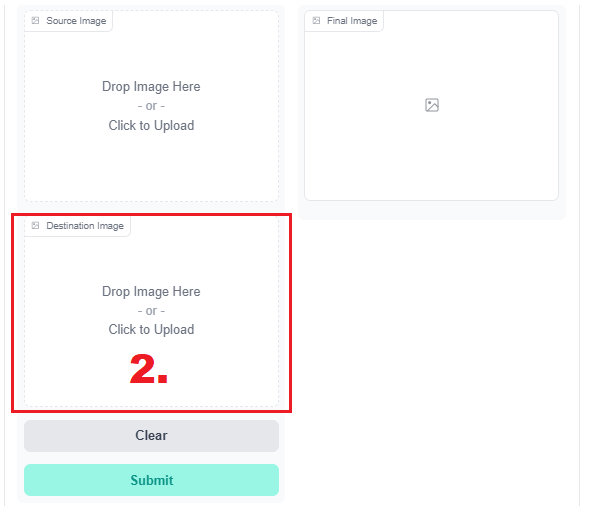
Ensure that the destination image is clear and that the face is visible for the best results.
The tool interface will now display both the source and destination images side by side.
Step 3. Click the Submit Button
- Once both the source and destination images are uploaded, look for the submit button on the screen.
- The submit button is usually located near the images or at a prominent place on the page.
- Click this button to start the face swap process. This sends your images to the AI for processing.
Step 4 . Face Swap Processing
- After clicking submit, the AI begins the face-swapping process.
- This usually takes only a few seconds. You might see a loading icon or a progress bar indicating that the tool is processing your images.
- The AI algorithms work to accurately swap the faces while maintaining the natural look of the images.
Step 5. Download the Final Image
Once the face swap is complete, the final image will be displayed on the screen.
You’ll find an option to download this image, usually indicated by a download icon or button.
Click this to save the final swapped image to your device.
There is no cost for downloading; the entire process from start to finish is free.